Draft Cycle Works

Wednesday, May 19, 2010

Built From Passion: Jim Hall's Turbo 1550 cc CBX


The CBX1000 hails from an older line of GP 5 and 6 cylinder race engines that were designed by a young engineer by the name of Shiochiro Irimajiri. Irimajiri, in his early years at Honda, designed the infamous 250 CC and 297 CC 6 cylinder GP race engines, as well as the 23,000 rpm 50 cc twin, and the 125 cc 5 cylinder of the late '60's. These engines all kept with the traditional Honda theory: More RPM = More Power (to put it crudely). Irimajiri was designing these engines to compete against 4 cylinder two-stroke engines and cylinder multiplication was his competitive solution. As is life, all good things must come to an end... Or a brief pause.

The advancement for a Honda engineer back then was from racing to production. A young engineer would begin working on the GP engines while the more experienced engineers designed production vehicles for the worldwide market. After Irimajiri had designed a multitude of innovative GP engines in his 20's, he began working on production vehicles for Honda. During the 70's he, and other top engineers, worked on the CVCC engine and the Honda Civic. The market for small, efficient automobiles was increasing and Honda had to keep up with the competition. Once the Civic project was completed, Honda moved Irimajiri from their only R/D facility in Wako, to a new facility in Asaka. The motorcycle division was now in Asaka, and the automobile and power products division remained in Wako. Up until this point in 1974, Honda only had one research facility.

With the line of motorcycles produced by Honda becoming dated, it was necessary to create something new and appealing for a Go-fast market. Up on the drawing board were two engines, a 4 cylinder 1000 cc engine and a 6 cylinder 1047 cc engine. Both designs carried through for 6 months until it was decided that the 6 cylinder be used. This decision was made based on several attributes. 6 cylinders had been proven to give smoother power over a 4 cylinder and there is an incredible sound that can only be produced by a 6 cylinder. The longevity of a 6 cylinder over a 4 cylinder had also been proven by the experiences of the Project Leader, a 37 year old Shiochiro Irimajiri.

From the drawing board to production, the CBX1000 only took a year and a half. The research was already completed from thorough testing of the 5 and 6 cylinder engines of the 60's. 1978 debuted the first CBX1000 with 105 bhp and a quarter mile time of a reported 11.36 s.

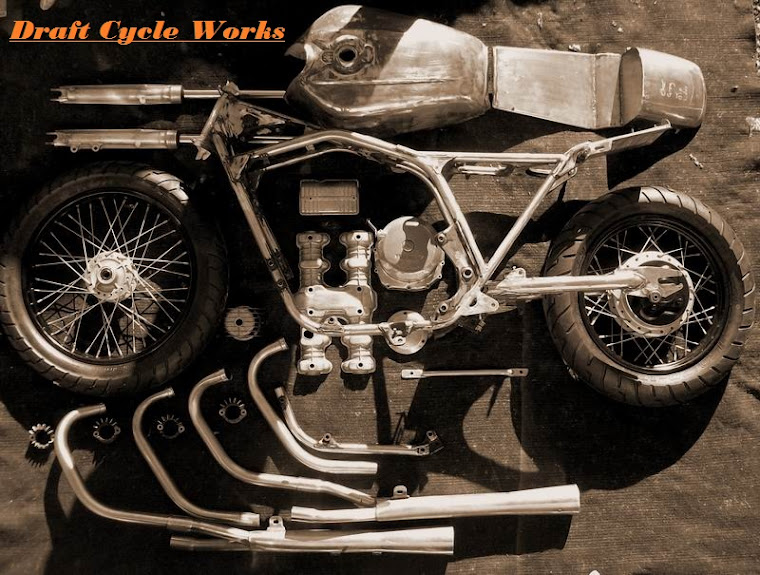
Now enough of my own historical babbling. I read the following article a while back and am still in aw over the attention to detail and the determination that is evident by simply viewing a few old grainy pictures. Jim hall took the legendary CBX1000 and turned it into a reliable land rocket.

I have taken this article from the CBX Club website and it is originally from the November 1989 issue of Cycle World.

Someday I'd love to get my hands on one of these engines.
Monday, May 17, 2010

LEMON (juice) PARTY!!! Cleanin' Green and Cheap

We all want to do our part to save the world right? Save the environment? Save the whales? Ok fine, save some money. Damb! Well here's a little trick to save some greenbacks, avoid using funky chemicals, and clean the bajeeezus out of your grimey aluminum parts. John brought this up to Jeff at Saint Motorbikes a little while back and his results were spectacular.

Here's what you'll need:

Lemon Juice
(I went through 3.5 of these bottles)

Warm soapy water and a scrubber

Pipe cleaners
(if you're working with carbs, this is helpful)

Outdoor redneck stovetop
(this can get a bit smelly, so outside
or risk a beating from a cohabitant)

A good friend to keep you company

Some nasty parts
(vm29 smoothies will suffice)

More nasty parts
(RC distributor housing)


Now getting started is pretty easy, but let's lay down some ground rules:
1. Watch your fluid level
2. Watch your heat and monitor for boil overs

3. Move the part occasionally so that it doesnt get too hot from sitting on the bottom.
4. Don't drink the bath water.

To get started, heat up enough lemon juice to cover your part as much as you can. I should have used a larger pot, but this is all I had. I you too have a small pot (nothing to be ashamed of) just make sure you dont fill it to the top. This stuff foams up quite a bit.

Once you have a boil, place your part in the pot and bring the lemon juice back to a boil. Move your part around and let it boil for about 30 minutes for a really good clean.


Continually check your fluid level. If you begin to get low, you can add water or more lemon juice. After I was finished with the RC distributor housing, the fluid was full of crap, so I chucked it and put in new lemon juice.


While the second part is boiling, you can rinse off the first part. Boiling in lemon juice brings all the grease and fuels to the surface of the aluminum. It is acidic enough to clean, but not acidic enough to eat away at the aluminum. Once you are finished boiling, you are left with a film all over your part. Rinse it and scrub it in soapy water and then dry it off.

What is the sound of clean?

Here's a comparison between a boiled carb and a carb that has only been scrubbed and doused with carb cleaner. The surface of the boiled carb is much smoother.


To see that the lemon juice actually removes the residues from the aluminum, take a look at the fuel stains that have been removed from the top carb.


Now I tried boiling the carbs with the paper gaskets still glued to them. I did this just to see what would happen to them because under the jet block on VM29 carbs is a really thin gasket that is a pain in the ass. Everything turned up Milhouse! (that means good) The top cap has been boiled in lemon juice and the bottom cap has not. The boiling removed some of the loose pieces from the gasket, but it is still intact and in good working order. It actually became a good bit softer.


While I was waiting for the other carb bodies, bowls, and caps to boil, I cleaned up the internal bits as well.


The whole process took about 4 hours since I didnt have a large pot to do them all at once. The end results were worth it. If you do have a large pot and are going to do a number of parts at the same time, I do recommend doing anything with a gasket separately so that you can check it easily and it wont get damaged by the other parts. Ohh and avoid rubber gaskets if they can rest against the bottom of the pot.


Beautiful Carbs!


Now go find some parts and have yourself a Lemon Party. FYI, don't search lemon party on google.

Wednesday, May 12, 2010

Long and Strong

Thank you Sir Mix-a-lot for those inspiring words.


Boat anchor:

Engine:

Patient:

Survivor:

Four Cylinder Lope.
1-4/2-3 pipes + big cam + Mag locked @ 35* BTDC= mmmmm


Total Length: 10’ 4”
Neck Height: 40.5”
Rake: 56* (51* neck, 5* internal)
Trail: 3”

Frame: Santee swingarm raked to 51*, 1.5” widened fender struts, Harley 1” neck
Engine: 10.9 to 1 CR
1978 CB750 F bottom end
backcut F model transmission
worked crankshaft
CycleX Super Rods
Wiseco 836 forged piston kit
Decked cylinders
Stage II Mreick Ported and Decked 1976 K head
33.5 mm OS intake valves
Heavy duty valve springs
Adjustable Cam sprocket
Yoshimura Daytona Cam
Stock Carbs (vm29's going on in a couple of months)
Barnett Clutch and spring setup
ARD Engineering Magneto w/ Clear Cover (RC dist w/ optical pickups soon)
Exhaust: 1-4 / 2-3 crossover primaries w/ slash-cuts. Black header wrap. Barely baffled
Swingarm: 81 cb750 DOHC clearanced for 180 mm tire, modified for eye-eye shock and HD brake system
Front End: 22” over (50”) fresh built girder w/ 5.5” long control arms and a 13.25” sportster shock. 5* of internal rake. P and P style independent control arms and trees. Internal brake lines
Paint: Cinder candy apple red with gold micro-flake in the clear.
Pinstriping: black and tan.
Front Brake System: Goldwing/CB750F twin disc
Rear Brake System: Two piston Harley caliper w/ 11” disc
Tires: 90-90-21 ME880 up front and 180-55-18 ME880 in the rear
Rear Suspension: 11.75” sportster shocks w/ cut springs
Tins: Rolled edge sportster tank w/ aircraft style cap, 9” wide racer rear fender
Seat: HD Fatboy King/queen
Lighting: Integrated turn signal rear brake light, turn signal mirrors, and dual 4.5” headlights
Gauges: Acewell Digital speedo/tach/info center
Final Gearing: 18-46

Random Stuff:
Added a center stand (freakin’ killer, easy to use and the bike is very stable)
Removable tool box on sliders under the carbs.